
Hello everybody ^^
So, the post that you've all been promised and, I like to think, waiting for!
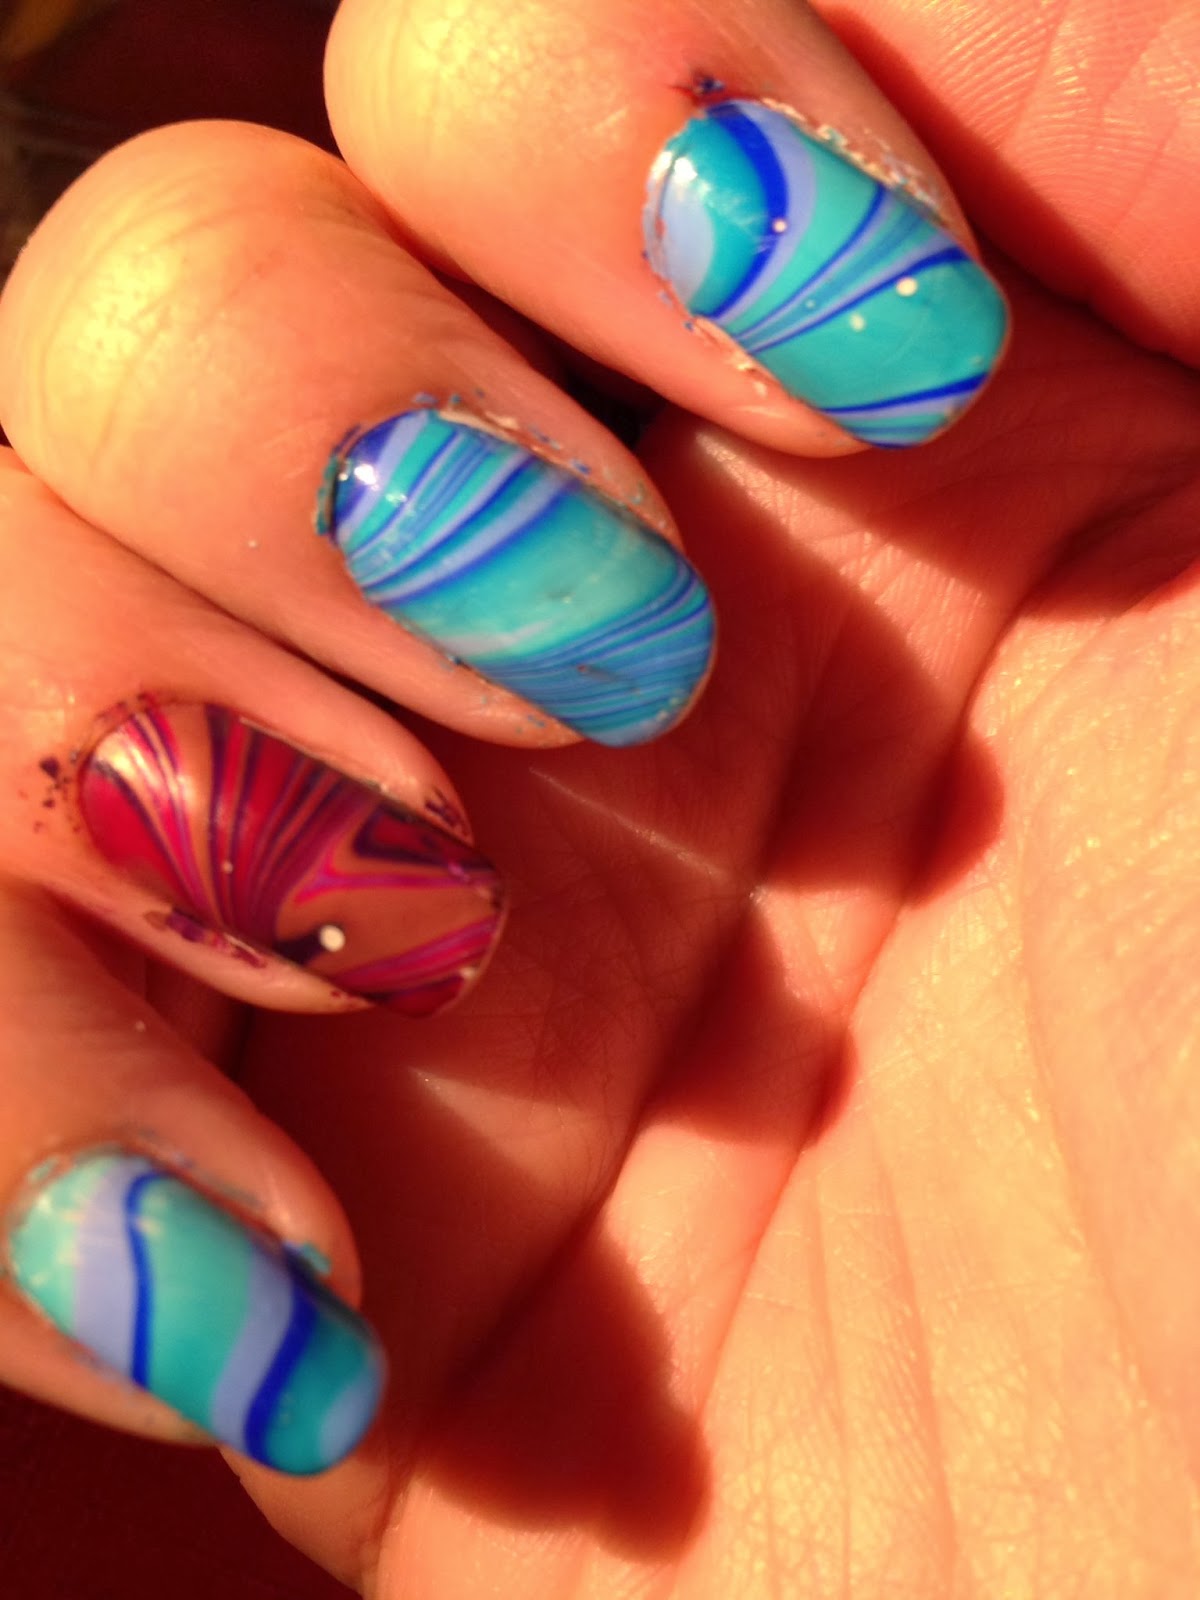
Here is what a water marble looks like- pretty, right? :D


4. Be prepared (again)!


The Polish Discoveries:
The polishes I've had the most luck with and are definitely what I recommend for you to use, are Barry M's Gelly's! They just spread out so nicely, leave your nails super glossy AND look amazing. I literally swear by them!!!
So, the post that you've all been promised and, I like to think, waiting for!
Here is what a water marble looks like- pretty, right? :D

It's such an easy design to do, tends to stay on for a while and just looks so damn good! Of course there are a few tricks to the trade I've discovered along the way, and I shall share those with you as we journey through the greatness that is the "How to: Water Marble!"
You WILL Need:
- A selection of coloured polishes (usually 2-3 colours per nail, but go wild!)
- A shallow (but not too shallow) pot, with a 'medium' sized rim- no bigger than that of a beer glass!
- A toothpick, orange stick, unwanted pencil or an item similar to those listed that more-or-less rounds to a point and isn't too thick
- Clear coat polish
- Room temperature water (for some reason it works best- probably because it isn't shock-drying the polish, and also filtered water works best too, if possible)
- Nail Polish Remover/Acetone
You MAY Want:
- Kitchen roll/cloth etc. to avoid any mess
- A white polish to use as a base coat (recommended, as it makes your colours POP!)
- Sellotape/scotching tape or cuticle oil to put on the finger around the nail to save clean-up (also recommended, if you can be bothered, which I for one, cannot)
TOP TIPS!
Let's get on with it then ^^
- Filtered, room temperature water!
- ***It's all in the polish! Check out what polishes other people have used, and also test them in the water before you dive in!***
- Unscrew the polish lids before you start
Let's get on with it then ^^
1. Set up your 'working' area (complete with "Do Not Disturb" sign & your favourite TV show in the background)


^Keep your nail polish remover, cotton pads and your orange stick/toothpick/weapon of choice (& spare water) handy at aaaall times- just in case.
Having all this set up means you won't be fondling around looking for anything and you have a nice open space to work with (and you don't have to get up to get anything= bonus!)
2. Bye-Bye old mani!

Grab that nail polish remover and say your goodbye's! You may meet again.... Maybe, depends how much you love your marbling experience :P
3. (optional) Paint on that White base!
Let's get busy then- it's time for a base coat. Now, remember, even if you aren't using a white base, make sure you put a clear coat on to protect your nail! But really, having a white base coat really does help the colours of your marbled-mani look so much brighter.
And! It doesn't even have to look that tidy cause you're covering it up again!


White used here is Barry M "Matt White" (available for £2.99 in Superdrug, Boots & BarryM.com)
Now wait until that base coat is dry (to the touch- doesn't have to be perfect!)...
And rearrange your working area =) You wanna have your little pot/glass/whatever somewhere easy for you to rotate your hand and place your finger into the water- you don't want to be trying to move it later. Have your orange stick somewhere that you can easily pick it up from.
And finally, unscrew all of those nail polish caps! It's so much quicker than "drop, screw, unscrew, drop, screw, unscrew, etc."
5. Ready? Okay, let's do this!
Right, I want you to pick out your nail polish colour, and let a drop of it fall into the water (so do not scrape the brush on the edge of the pot). If it's a decent polish for marbling with, it'll spread nicely throughout the water like some kind of party trick- but don't wait too long just staring at it- add your next colour and keep alternating colours til you get an awesome bullseye ring, like this!

Awesome, isn't it?

6. Trace your pattern
Grab your orange stick, toothpick, pencil, or other object of choice and drag it through the water/nail polish combo (from the outside in, but try not to fold the polish on itself- usually works if you try starting from two or three rings in).
This should make awesome swirly patterns and stuff- just mess around and see what you like ^^


7. Here comes the important part...
Line your fingernail up above where the pattern is that you want to show...
(I hope that made sense...)
And then slowly-ish dunk it in... Erm, dunk is a really harsh word actually, let's say this instead...
Gently/slowly-ish lay it in.
You need to make sure that the whole nail is completely underneath the water as then you know that all of it will have some colour on it =)

^Such a bad picture, but you should be able to get the idea, I hope? :3
NOW KEEP YOUR FINGER IN THE WATER TIL I SAY SO!
Anyway! Now, grab your orange stick/toothpick/etc with your other hand. Now blow onto the polish on the top of the water, to help it dry. With your orange stick/toothpick/etc, you want to submerge it into the water a bit and then twist it round, so you (hopefully) are picking up the layer of semi-dry nail polish that's on the surface. (It's a bit like a 'skin' on the gravy or custard...)
When you're sure that the nail polish layer is gone from the water, you may lift your nail out...
Hopefully to be amazed with a funky pattern like so!

YAY!
(Now if it worked first time, throw a party, but don't get fed up if it didn't- these things need a bit of practice)
8. Repeat for the rest of your hand(s)
Unfortunately, this is a very time-consuming process, but you can cheat a little... if you dare.
No really, it's not that hard, just do two (or three if you live on the edge) nails at a time. I usually do my thumb by itself, then my index with my middle, and finally my ring and pinkie =) Saves a fair amount of time really!
9. Clear Coat!
Don't forget your clear coat to lock in that colour! :D
And now feel free to wait a little bit to make sure it sets... =)
10. Tidy tidy tidy!
Now if you're like me, you'll have made a bit of mess all over your fingers...


... appealing, isn't it?
So grab that acetone/nail polish remover and get scrubbing! :D
And that's it, we're all sorted :D I leave you with more pics and some good polishes to use in your marbling!


I reeeeally love the way these turned out actually- mega chuffed moment! :D
The polishes I've had the most luck with and are definitely what I recommend for you to use, are Barry M's Gelly's! They just spread out so nicely, leave your nails super glossy AND look amazing. I literally swear by them!!!
And, what I discovered this time around is that Barry M MATTE Polishes- yes, matte! actually marble reeeeally well too. And as easy as it is just to grab a matte top-coat to put over a marble, it's even better because now you can make a part matte, part shiny water marble. What. A. Beaut. Love it. Like literally, I died when this worked.
Polishes Used:
Barry M Gelly: Guava (green-blue), Blueberry (pale blue), Blue Grape (bright blue) and Plum (purple)
Barry M Matte: Mocha (beige) and Crush (red)
And for my final say on this post (it's been a long one...), I wish you GOOD LUCK! (You may need it!)
Of course, don't forget to comment me, tweet me, and like my facebook page! (links all over the place)
***I want to see your marble designs!***
Much love!
Rachel xxx
I love this! Looks awesome and now I know that gelly polishes work, I'm going to give it a go over the next few weeks! Thanks for all the info :) xx
ReplyDeleteThanks! And no bother, it really is easier than it might look, especially with the right polishes :) xx
DeleteWow beautiful!!! nice blog! would you like to follow each other with GFC and Bloglovin?
ReplyDeleteBesos, desde España, Marcela♥
Thanks! And yeah sure :)
DeleteThis looks amazing!!! Alica x
ReplyDelete